Update: The full build instructions are available on the intervalometer project page on the Radio Shack DIY web site.
I recently built this Arduino-based camera remote/intervalometer:

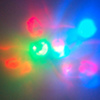
It uses a really simple interface: you dial in the speed you want, referring to the blinking LEDs, and switch it into “go!” mode when you want it to start taking pictures. Here it is in action:

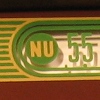
The innards:

This is another project I created for a series of print and video how-to “advertorials” I’m working on for Popular Mechanics and Radio Shack. There will be more detailed info on how to build your own when it goes to print (along with a video and detailed build instructions online).


Pingback: Arduino permette di creare un intervallometro da fotocamere digitali | RampaCrew
Pingback: Arduino permette di creare un intervallometro da fotocamere digitali | Indipedia – Indipendenti nella rete